Sunday, February 27, 2011

Southern Supper!

On Wednesday I decided to cook supper before Jamie made it back from Khuno's walk. I didn't manage to finish it by myself and ended up recruiting Jamie to help me chop veggies. I was craving something hearty and tomato-ee so I decided to make chili! 
There's no recipe I followed but I will list off what's in that big ol' pot! 
- ground turkey and ground beef
- 1 whole head of garlic!
- 2 med onions, diced
- 2 large carrots, diced
- 5 stalks of celery, diced
- 1 red pepper, diced
- 1 can of tomato paste
- 1 large can of plum tomatoes
- chili powder
- cumin, oregano, red chili flakes, 3 bay leaves, onion powder, paprika, salt
- salsa mix (from Epicure)
- Worcestershire sauce
- 1 can of white kidney beans
- 1 can of black beans 
- chicken stock
- Beef bouillon (I know it's weird that I used chicken and beef...)
I also decided to make cornbread because Amber at work had made some and when I was looking at chili online, cornbread seemed to be the main side that accompanied it. I used this recipe found on allrecipes. I didn't fry it in a pan so I was able to omit all the oil and I just baked it in an 8x8 pan lined with parchment. Baked it for almost 20 minutes and it was delish! 


Monday, February 21, 2011

Wedding Invites

The supplies have arrived for a couple of weeks and they are still sitting in the box. Crafting is fun but when you need to do something, it no longer is enticing. I have been doing everything BUT making my invitations. Perhaps it's because I know once I make a few, I'll need to make them all! Or maybe it's because I work better under pressure and I am the queen of procrastination. Either way, hopefully I can get a few done before the end of the month. Or at least get some samples made up. 

Sunday, February 20, 2011

Wednesday, February 16, 2011

Jessica & Rob Photo Shoot!

My friend, Karen and I just finished taking an introductory DSLR photography class. So what better to do than practice what I learnt? Jessica and Rob (a ridiculously cute couple) graciously agreed to let me photograph them. Our coworker, Alice, did Jessica's gorgeous makeup for the shoot. Here's a few edits I've done so far. 


Tuesday, February 15, 2011

Valentine's Day

It's been a whirlwind of a weekend. I've been going non-stop since Friday and I'm glad I had a restful Monday off. We had a Valentine's Day themed girls' night. We needed to wear and bring food that was either red, pink or white. 
Unfortunately we forgot to take a group photo but as you can see, it was super fun with all the matching colors! As for food, we had a huge assortment! 
Marilyn not only made meatloaf with heart shaped ketchup topping, but she also got ENGAGED!!! She strategically planted her promise ring into some mini banana loaves that she baked. After coaxing us girls to eat the loaves all night, we finally discovered this ring in the midst of all these loaves. First thought? "Sick, who left their ring in the banana bread?" That's when Marilyn put her hands up to her face exclaiming, "I've been looking for it all day!" I'm not drawing a very good picture, but she basically had her engagement ring on while she was exclaiming. Very sneaky of her! And yes, she claims she cleaned the ring first.
We also had red nachos with red salsa and pink sour cream, heart shaped pizzas with a bunch of red toppings and a beet salad. After all the eating, we decorated our own mailboxes and handed out Valentine's Day cards! 
We even had a special visit from cupid! 
And to finish off the big day today, I made a card for Jamie. As you can tell I sorta misjudged my word placement. Oh well! 
P.S. The card isn't my design. I CASEd it from Kristina Werner. You can see her original card here

Saturday, February 5, 2011

Oatmeal Soda Bread

I've been trying to find a good soda bread recipe since they are usually ridiculously easy so I attempted another one today. The recipe is for Oatmeal Soda Bread and it was found on allrecipes.
I ended up adding the leftover seeds I had from the Six-seed Soda Bread. The recipe was really easy and I mean really really easy. Mix together dry ingredients and then in a separate bowl, mix together wet ingredients. 
Add the wet to dry and form a dough. The recipe doesn't call for any kneading at all but I had to do it for a minute or so just to incorporate everything. 
After handling the dough for a bit, I shaped it and put it onto a baking stone sprinkled with corn meal to prevent it from sticking. The funnest part, scoring the dough and adding the seeds to the top. I forgot to brush the top with something to help the seeds stick so most of it fell off onto the stone. 
I managed to squash it down a bit more because the six-seed soda bread was too ball-ish and didn't bake thoroughly. 
I tried shoving a bunch of seeds into the score lines but when I went to eat the bread, all the seeds still slid off. The bread took under 10 minutes to prep and baked for about 35 minutes. The crust is quite tasty (not sure if it'd be as tasty without the seeds I added) and it's not that bad for you. I used 1/2 whole wheat and 1/2 all purpose flour. The worst part is probably the 1/4 cup of melted butter. If you give this a go, let me know how it turns out without all the seeds! Lastly, did you happen to notice me using my fancy new potholder? 

Potholder Part 2

How super fun is that picture?!? And no, it's not my hand. It's Jamie's. And it's Ferris Bueller's Day Off playing in the background. I've never seen the movie before so Jamie kept pointing out all of the Family Guy references. 
I love how Jamie's hand naturally looks all dainty and girly when I told him to hold the potholder by the strappy thing. 
Another view of the back. I'm really quite happy with how it turned out! Is it crooked and sewn badly? Yes, but I sewed it badly so it's okay! Remember that chocolate zucchini loaf I made a while back? I had made a double batch and froze the other loaf. We pulled that sucker out the other day and let it defrost overnight on the counter. Tasted just as good. Just remember to heat it up so the chocolate chips are all melty. 
The potholder also serves as a little place mat! 

Prudent Baby - Sewing Machine Double Down!

I was surfing the web a while back and came across Prudent Baby. I instantly fell in love with the site! It's full of super crafty things and tons of tutorials and it even links you to other crafty blogs! It's totally crafting blog heaven! Prudent Baby is hosting a contest called the Sewing Machine Double Down. I'm not a huge sewer but would love to be. With the wedding coming up, I was hoping to sew a few things like fabric flowers etc. I thought, "How sweet would a new machine be?" To enter is simple. Sorta. You just need to sew a pot holder! They even give you a few tutorials to go off of. I chose this one. It looked simple enough and I really think the fabric got me. So today I went on a hunt for fabric at Fabricland. $80 later, I came home with 2 meters of fabric, 1/2 a meter of Insul-Brite, 2 packages of bias tape, 2 spools of thread, a package of pins and a 3 year membership. 
I definitely felt overwhelmed. It took me a long time to find fabric I liked and of course, the ones I liked were expensive! I also had to get the sales associate to show me how to sew the bias tape. I also followed the tutorial here. I told Jamie I was nervous sewing and then asked myself why. I've sewn before and it's not like I can't go out and buy more fabric if I mess up! So with that in mind, a sewing a did go. 
Now you might be thinking the potholder is just placed crooked, but oh no. It's actually sewn crooked because the darn Insul-Bright was so thick with 2 layers, it was so hard to keep everything straight! I also learnt from Arlie that I was supposed to pin everything so that it'd stay a square! I couldn't salvage it but decided to push on. 
The backside really doesn't look that bad right? The pink side was definitely the uglier side. It was the side that was facing me while I was sewing. 
This little piece here goes on the front of the potholder so you can slide your hand in. I decided to pin the darn thing in place because there was no way I could sew that bias tape without pinning. Another thing I learnt: sew along the crease, not just in the middle because when you wrap your bias tape over the fabric edge, it pulls and looks ugly. You might have no idea what I'm talking about but trust me, you want to sew right along the crease! 
Jamie helped me decide which side I should put the extra little slot for the hand. I was leaning towards this combination too. 
More fantastic pinning. You have no idea how many times I poked myself. Those suckers are sharp and when you get one of them poking you underneath your finger nail, you wanna just pick up the potholder and shred it to pieces. 
After pinning the back side and sewing it in place, I had to pin the other side. This took a long time partly because the pins I bought bend really easily and all the layers put together were really thick. It's definitely coming along though! I can see the light at the end of the tunnel! 
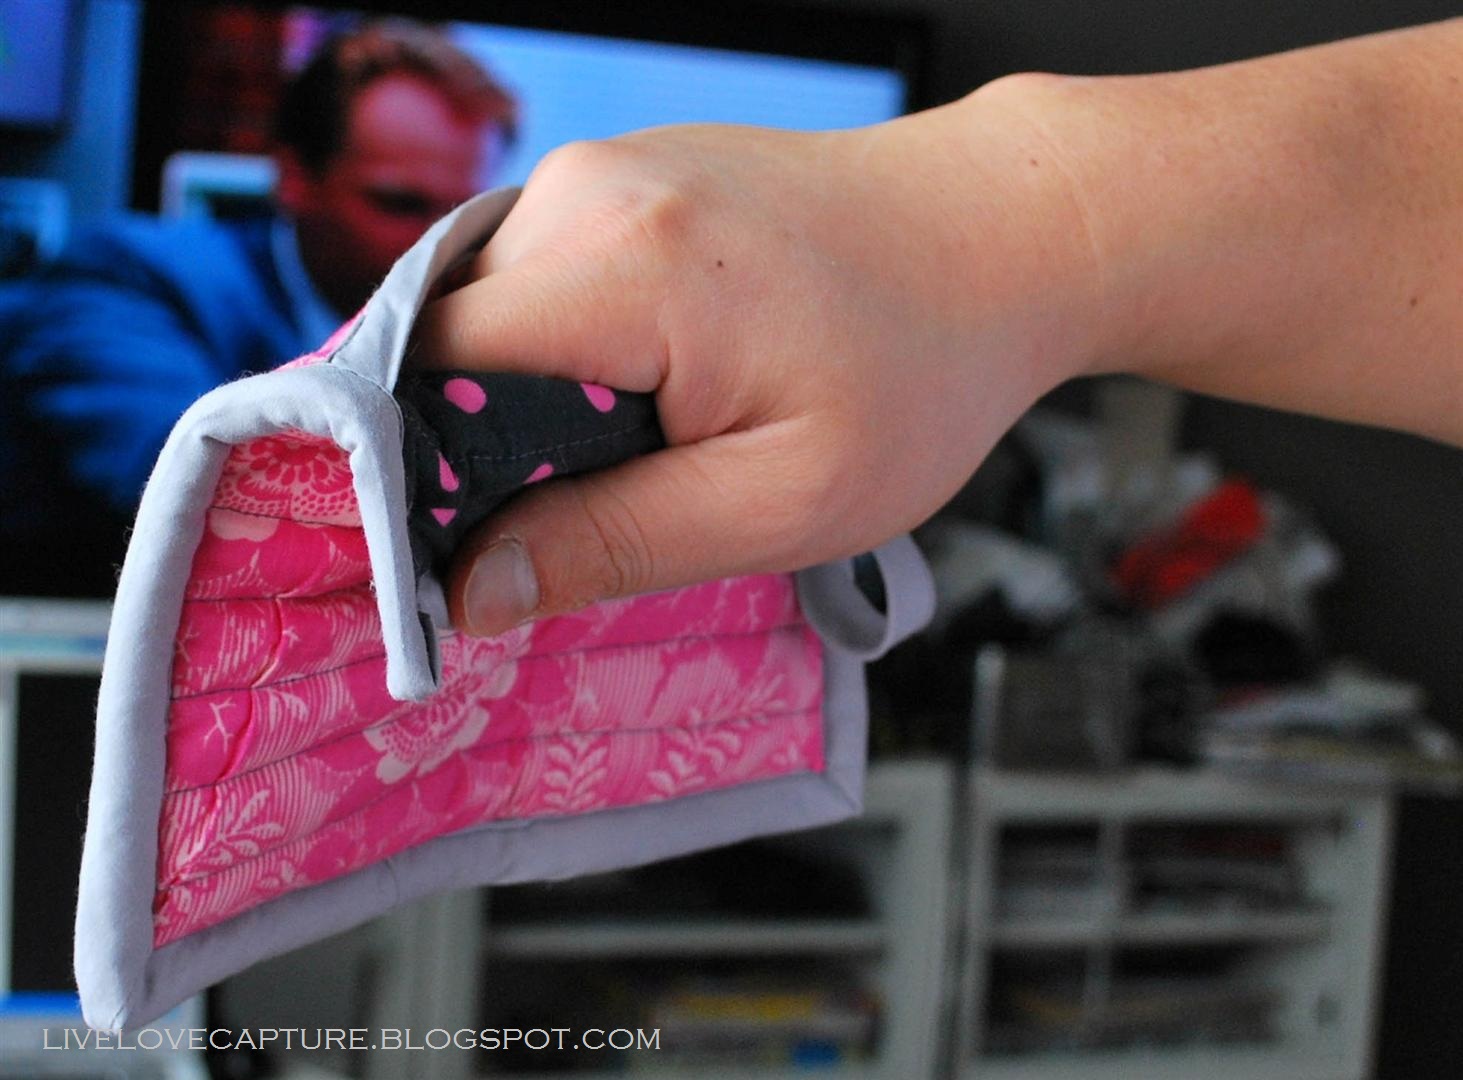
Voila! 2 1/2 hours worth of work to make this sucker. Was it worth it? Absolutely!!! Hopefully doubling up on the Insul-Bright lining will make it heat resistant enough to pull things out of the oven. I also hope it doesn't fall apart after a few uses! Here's a look at the back. 
Now for the kicker. I thought to win the contest, they were going to do a random draw because it said something along the lines of, "No sewing machine? Pick up a needle and thread!" It definitely misled me! I went to read the contest rules and guess what? THEY JUDGE!!!
Contest consists of two (2) rounds of evaluation. In Round One, each judge in the panel (at least one of whom will be independent of Sponsor) (“Judges”) will select ten (10) entries in each Category from among all eligible entries based on the following criteria (“Judging Criteria”): (1) Originality 25%; (2) Style 25%; (3) Workmanship (25%); (4) Presentation (25%). The entries selected in Round One will proceed to Round Two. In Round Two, the Judges will collectively select two winners based on the Judging Criteria. In the event of a tie, the tied entries will be re-submitted to the Judges for a re-judging between the tied entries alone. In the event that a tie remains after re-judging, the entry with the highest score in the originality criteria will be declared the winner. Winners will be chosen on or around February 11, 2011, and notified by email. Decisions of the judges are final and binding.
Well... I wasn't original because I copied their pattern exactly. The style is also the same... My workmanship is crap and my presentation bleh. So after all that work, I realized there is no way I'm winning that cool sewing machine. Sigh. To see more pictures of the potholder, go to this post

Tuesday, February 1, 2011

Peanut Butter Hummus

While doing our regular Tuesday night grocery shopping, I walked by the pita breads and had a little craving. So I asked Jamie if we should buy some pitas and make hummus. It was easy deciding whether or not to buy the pitas but the question was, should we buy the cute little ones or the big ones? Were the little cute ones whole wheat? Nope. Would they taste better? Yup! Not because of their wee little size but the yummy white flouriness of them. So after we decided to go for whole wheat, I asked Jamie if we should get the 6 pack for $2.98 or the 18 pack for $5.49. "18 pack 18 pack!!!" I put three "!" because he was actually excited. Kind of like a little kid in a candy store saying, "Yes yes yes, I want candy!"
I came across a recipe on How Sweet It Is for Peanut Butter Hummus and I knew I wanted to give it a go. We've made hummus before and it's been delicious so really, as Jamie would say, "How hard can it be?" I didn't want to just use peanut butter so as you can tell from the picture, I threw in a big spoonful of both tahini (although I just noticed it says tahina on the bottle...) and peanut butter. Cracked open a can of chick peas and poured off a bit of the liquid. A secret I learnt from someone at work was to thin out the hummus with the left over liquid instead of oil. You'd think this person was saving calories but oh no no. She finishes off her hummus with a nice heaping drizzle of olive oil. 
I know the picture looks absolutely like chunky corn vomit after a glass of soy milk but it did indeed taste pretty gross! I added way too much peanut butter and I also tasted it before I added salt. I made Jamie try it and he's like, "Ugh...did you follow the recipe?" My response was, "Pffft, we never follow the actual recipe! I just know she puts in peanut butter!" I end up getting Jamie to squeeze in another whole lemon and we add in a bunch of salt and garlic. 
That's the lovely fluffy hummus we ended up with. It starts off with a bang of peanut butter when it touches your tongue and then ends off with the lovely stench of garlic. Will I be sharing this lovely creation at work? You betcha.